The Crunch That Started It All
I remember my first homemade chip. It was warm, salty, and shattered perfectly. That crunch was pure joy. It beat any bag from the store. Ever wondered how you could turn simple spuds into something unforgettable? That first bite made me a believer. I knew I had to learn. The process is simpler than you think. Let’s make some magic together.
My First Salty Adventure
My first batch was a learning experience. I sliced the potatoes too thick. They were more like crispy wedges than chips. My family still ate them all, laughing. That kitchen mess taught me a good lesson. Home cooking is about the try, not just the perfect result. It connects us. Those imperfect chips started a family tradition. Now we make them every game night.
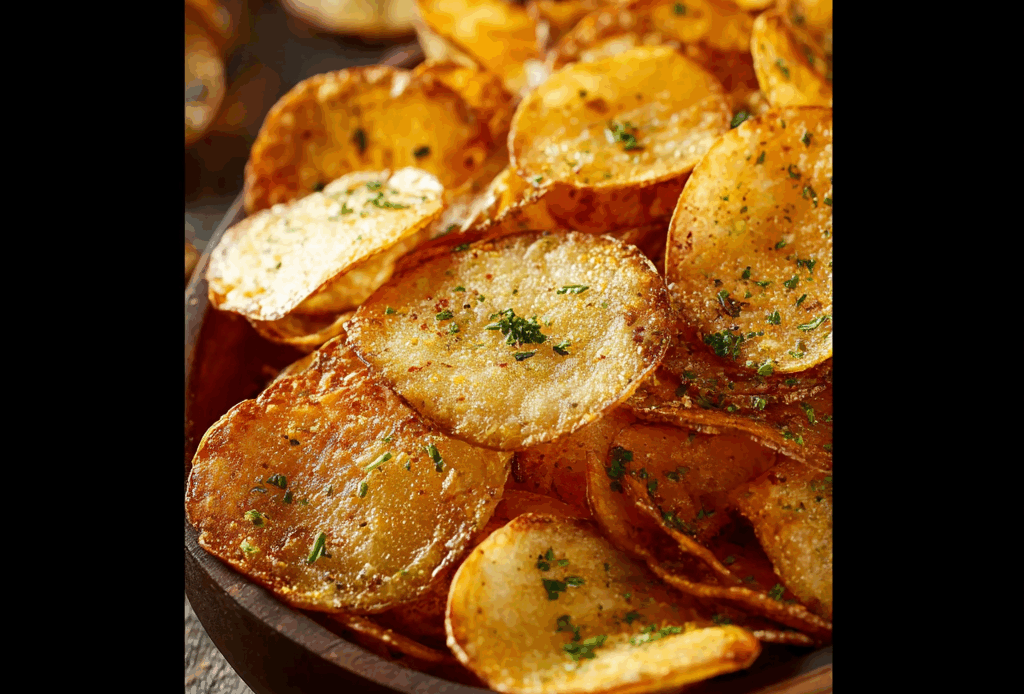
Secrets to the Perfect Chip
Two things make these chips special. First, thin slices mean an even, crispy fry. Second, drying them before frying stops sogginess. Try sprinkling them right after they leave the oil. The seasoning sticks better that way. What will you try first? Which flavor combo surprises you most: smoked paprika or rosemary with garlic? Tell me your favorite in the comments.
A Slice of History
This snack has a fun past. A chef in New York created them in 1853. A fussy customer kept sending back fried potatoes. The chef sliced them paper-thin out of spite. The customer loved them. They were an instant hit. *Did you know the original name was “Saratoga Chips”?* Have you ever made chips at home? Share your story with me.

Ingredients:
| Ingredient | Amount | Notes |
|---|---|---|
| Russet potatoes | 2 large | Or Yukon Gold |
| Vegetable oil | For frying | |
| Salt | To taste | |
| Vinegar | 1 tablespoon (optional) | For soaking (prevents browning) |
| Seasonings (e.g., paprika, garlic powder) | To taste (optional) | For flavor variation |
How to Make Your Own Potato Chips
Step 1. Grab two large russet potatoes. Scrub them clean under cool water. You can peel them or leave the skins on. Slice them very thin, about 1/8 inch thick. Step 2. Soak your slices in cold water for 30 minutes. Add a spoon of vinegar to the water. This step removes extra starch. It also helps the chips get super crispy. Step 3. Dry the potato slices completely. Use a clean kitchen towel. Pat every single slice until it’s dry. (My hard-learned tip: Wet slices cause dangerous oil splatters.) Step 4. Heat 2 inches of oil in a heavy pot. The oil should reach 375 degrees. Use a thermometer for the best results. Carefully add a single layer of slices. Step 5. Fry for 2-3 minutes until golden. Stir them gently with a slotted spoon. Remove them when the bubbling slows. Let them drain on a paper towel-lined tray. Step 6. Season the hot chips immediately. Sprinkle with salt or your favorite spices. Let them cool completely before serving. They will crisp up even more as they cool.Three Fun Ways to Flavor Your Chips
Homemade chips are a perfect blank canvas. Try these simple spins for your next batch. Each one brings a whole new taste to your table.Serving Your Crispy Creation
Serve these chips straight from the bowl. They are great with a creamy dill dip. They also pair well with a simple burger. For a drink, try an ice-cold lager. A fizzy lemonade is a perfect non-alcoholic match. *Fun fact: The potato chip was invented in 1853!* They are a classic for good reason. I love seeing how everyone enjoys them. Which would you choose tonight: the lager or the lemonade?
Keeping Your Chips Crispy
These chips are best eaten the day you make them. Store leftovers in a paper bag. A plastic bag makes them soggy. You cannot freeze these successfully. They lose their perfect crunch. My grandkids never let them last anyway!Quick Fixes for Common Snags
Soggy chips? You did not dry the slices enough. Pat them bone-dry next time. Burnt edges? Your oil was too hot. Use a thermometer for control. Chewy centers? The slices were too thick. Aim for that 1/8 inch slice. Why does this matter? Texture is everything for a good chip. What is your biggest frying challenge? Tell me below!Your Potato Chip Questions
Are these chips gluten-free? Yes, potatoes and oil are naturally gluten-free. Just check your seasonings. Can I make them ahead? They are best fresh. You can slice and soak ahead, though. Dry and fry just before serving. What oil can I swap? Any neutral oil works. I use vegetable or canola oil. They have a high smoke point. How do I double the recipe? Fry in smaller batches. Do not crowd the pot. This keeps the oil temperature steady. Why soak the potatoes? It removes starch. This gives you that light, crispy bite we all love.Your Turn in the Kitchen
I hope you try this simple recipe. Nothing beats a warm, homemade snack. *Fun fact: The potato chip was invented in 1853!* Share your crispy results with us. Tag Savory Discovery on Pinterest with your photos. Happy cooking! —Elowen Thorn.


Homemade Potato Chips Preparation
Description
Make crispy, delicious potato chips at home with this simple recipe. Perfect as a snack or appetizer.
Ingredients
Instructions
- Grab two large russet potatoes. Scrub them clean under cool water. You can peel them or leave the skins on. Slice them very thin, about 1/8 inch thick.
- Soak your slices in cold water for 30 minutes. Add a spoon of vinegar to the water. This step removes extra starch. It also helps the chips get super crispy.
- Dry the potato slices completely. Use a clean kitchen towel. Pat every single slice until it’s dry.
- Heat 2 inches of oil in a heavy pot. The oil should reach 375 degrees. Use a thermometer for the best results. Carefully add a single layer of slices.
- Fry for 2-3 minutes until golden. Stir them gently with a slotted spoon. Remove them when the bubbling slows. Let them drain on a paper towel-lined tray.
- Season the hot chips immediately. Sprinkle with salt or your favorite spices. Let them cool completely before serving.
Notes
- For best results, slice potatoes uniformly and ensure they are completely dry before frying to prevent oil splatter.