Introduction
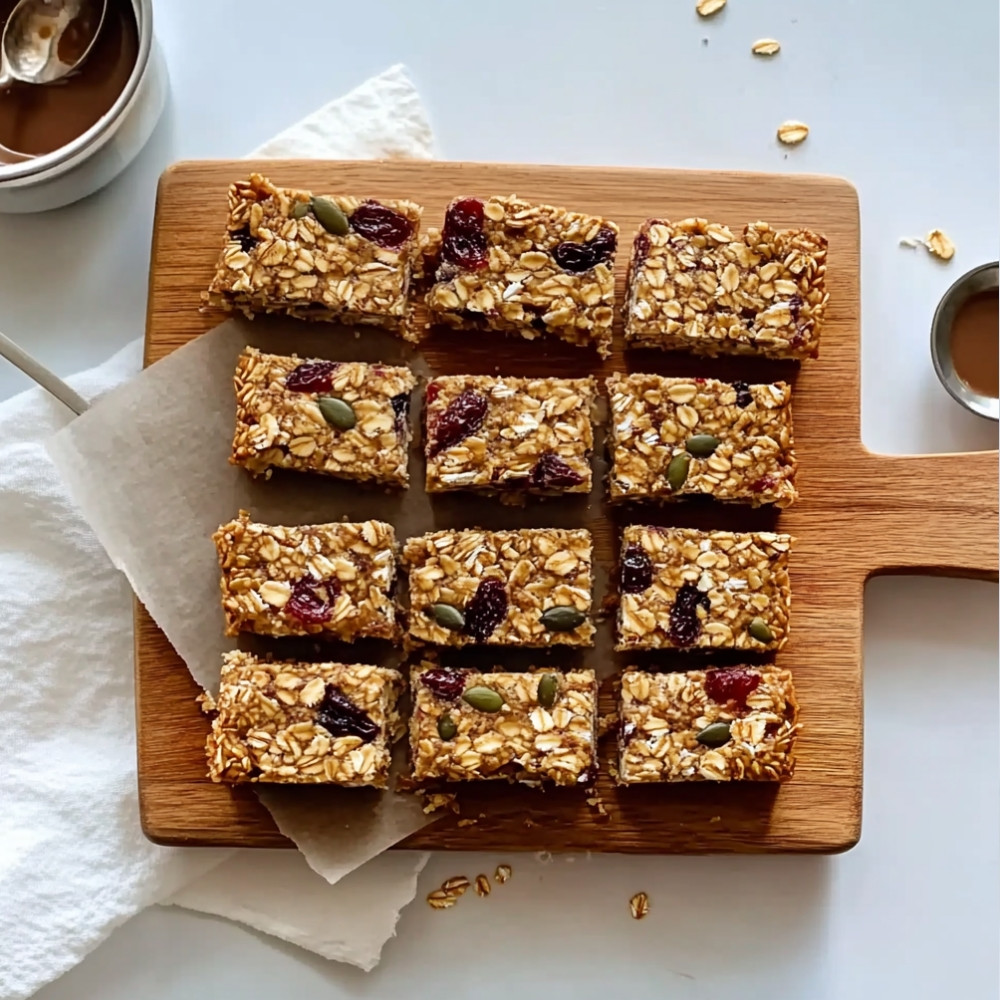
Homemade granola bars are a nutritious and delicious snack option that you can easily prepare at home. They are perfect for breakfast on-the-go or a quick afternoon treat. This recipe allows you to customize flavors and add-ins according to your preference, making it a versatile choice for anyone looking to reduce store-bought snacks in favor of homemade ones.
Detailed Ingredients with measures
Oats: 2 cups
Honey or maple syrup: 1/2 cup
Nut butter (peanut, almond, or cashew): 1/2 cup
Brown sugar: 1/4 cup
Vanilla extract: 1 teaspoon
Salt: 1/2 teaspoon
Chocolate chips (optional): 1/2 cup
Nuts or seeds (optional): 1/2 cup
Dried fruit (optional): 1/2 cup
Prep Time
15 minutes
Cook Time, Total Time, Yield
Cook Time: 20 minutes
Total Time: 35 minutes
Yield: Approximately 12 bars
These homemade granola bars are not only easy to make but also customizable to fit your taste preferences. Enjoy experimenting with different ingredients to create your perfect snack!
Detailed Directions and Instructions
Preheat the Oven
Preheat your oven to 350°F (175°C). Line an 8×8-inch baking dish with parchment paper, leaving an overhang on two sides for easy removal later.
Mix the Dry Ingredients
In a large bowl, combine rolled oats, nuts, seeds, and any additional dry ingredients such as coconut, chocolate chips, or dried fruit.
Prepare the Wet Mixture
In a small saucepan over medium heat, combine honey or maple syrup, nut butter, and salt. Stir until melted and smooth.
Combine the Mixtures
Pour the wet mixture into the bowl with the dry ingredients. Mix until all the dry ingredients are fully coated and the mixture is sticky.
Transfer to the Baking Dish
Pour the granola mixture into the prepared baking dish. Use a spatula or your hands to press it down firmly and evenly into the pan.
Bake the Granola Bars
Place the baking dish in the preheated oven and bake for about 20-25 minutes, or until the edges are golden brown.
Cool and Slice
Remove the baking dish from the oven and allow it to cool completely in the pan. Once cooled, use the parchment overhang to lift the granola out of the pan. Slice it into bars or squares.
Store the Granola Bars
Store the cooled granola bars in an airtight container at room temperature for up to a week, or in the refrigerator for a longer shelf life.
Notes
Variations
Feel free to customize your granola bars by using different types of nuts or seeds based on your preferences.
Sweetness Adjustment
Adjust the sweetness by varying the amount of honey or maple syrup according to your taste.
Add-ins
For a fun twist, consider adding ingredients such as dried fruit, mini chocolate chips, or spices like cinnamon or vanilla.
Keep an Eye on Baking Time
Oven temperatures can vary, so keep an eye on the granola bars while baking to ensure they don’t burn.
Serving Suggestions
Enjoy these granola bars as a quick snack, breakfast on-the-go, or in lunchboxes.
Cook techniques
Mixing Ingredients
Properly mixing your ingredients ensures an even distribution of flavors and textures. Start with dry ingredients, then gradually add the wet ones to maintain control over the consistency of the mixture.
Pressing the Mixture
After combining the ingredients, it’s crucial to press them firmly into the baking dish. This compacts the mixture, helping the bars hold together once they’re baked and cooled.
Baking Essentials
When baking granola bars, preheating the oven ensures they cook evenly. Additionally, lining your baking dish with parchment paper prevents sticking and makes removal easier.
Cooling Techniques
Allow the bars to cool completely in the pan before cutting. This step is vital for the bars to set properly and hold their shape when sliced.
Storing the Bars
Storing granola bars in an airtight container helps maintain their freshness. Keeping them in a cool, dry place extends their shelf life.
FAQ
Can I customize the ingredients in granola bars?
Yes, you can customize the ingredients according to your preferences. Feel free to swap nuts, seeds, or dried fruits to create your ideal flavor combination.
How long do homemade granola bars last?
Homemade granola bars can last up to a week when stored in an airtight container at room temperature. For longer storage, consider refrigerating or freezing them.
Is it necessary to bake granola bars?
Baking is not always necessary; no-bake granola bars can be made by using sticky ingredients like honey or nut butter that bind everything together without the need for cooking.
Can I make granola bars gluten-free?
Absolutely! By using gluten-free oats and checking other ingredients for gluten content, you can easily make gluten-free granola bars.
How can I make my bars chewier or crunchier?
To make your bars chewier, increase the proportion of sticky ingredients like honey. For crunchier bars, add more nuts or bake them a little longer.
Conclusion
Homemade granola bars are a versatile and nutritious snack option that you can easily customize to suit your taste preferences. With just a few simple ingredients, you can create delicious bars that are perfect for on-the-go snacking, lunchboxes, or a healthy treat at any time of the day. Experimenting with different add-ins allows you to keep the flavors exciting and cater to your dietary needs.
More recipes suggestions and combination
Chocolate Chip Granola Bars
Add dark chocolate chips to your base mixture for a sweet and indulgent twist that complements the wholesome ingredients.
Nut and Seed Granola Bars
Incorporate a variety of nuts and seeds like almonds, sunflower seeds, and pumpkin seeds for an extra crunch and healthy fats.
Dried Fruit and Coconut Granola Bars
Mix in chopped dried fruits such as cranberries, apricots, or raisins along with shredded coconut for a chewy texture.
Peanut Butter Banana Granola Bars
Blend in creamy peanut butter and mashed bananas to create a rich flavor that is both filling and satisfying.
Cinnamon Raisin Granola Bars
Enhance your bars with cinnamon and plump raisins for a classic flavor combination that evokes warm, comforting feelings.
Leave a Reply